Hi friends, in this tutorial we will discuss the step-by-step process of Laravel custom authentication. As we know that Laravel has already provided the default authentication for users along with the prebuilt login and register page. We can create the default authentication with the help of auth command as shown below.
But however, we want to authenticate users manually from different login pages and registration pages. In this case, you can do so by creating the custom controller using the default user model.
Required steps of Laravel custom authentication login logout and registration
Step 1:- Download and install the composer from getcomposer.org
Step2:- Create a laravel project with the help of the composer in the command terminal and start the project in the local development server using the artisan command as shown below one by one.
composer create-project laravel/laravel project-name
cd project-name
php artisan serve
Step 3:- Create default authentication using laravel breeze by running the following command as shown below one by one.
php artisan breeze:install
npm install
npm run dev
Note*:- Laravel breeze is a simple starter kit that provides authentication features including login, registration, password reset, email verification, and password confirmation, etc.
Step 4:- Set up the database in the .env file of your application as shown below
DB_CONNECTION=mysql
DB_HOST=127.0.0.1
DB_PORT=3306
DB_DATABASE=custom_laravel_db
DB_USERNAME=root
DB_PASSWORD=
Now you can run the below artisan command to migrate the default user table in the database
php artisan migrate
Step 5:- Now create a custom controller using the artisan command in the terminal as shown below
php artisan make:controller CustomAuthController
Step 6:- Now, set up the authentication routes inside the web.php file under the routes folder as shown below
Route::get('/custom-login',[CustomAuthController::class, 'front_user_login']);
Route::get('/custom-register',[CustomAuthController::class, 'front_user_register']);
Route::post('/custom-login',[CustomAuthController::class, 'userlogin']);
Route::post('/custom-register',[CustomAuthController::class, 'userregister']);
Route::get('/custom-logout',[CustomAuthController::class, 'userlogout']);
Step 7:- Now create two-blade files front-login.blade.php and front-register.blade.php respectively.
front-login.blade.php
<link href="https://cdn.jsdelivr.net/npm/bootstrap@5.0.2/dist/css/bootstrap.min.css" rel="stylesheet" integrity="sha384-EVSTQN3/azprG1Anm3QDgpJLIm9Nao0Yz1ztcQTwFspd3yD65VohhpuuCOmLASjC" crossorigin="anonymous">
<script src="https://cdn.jsdelivr.net/npm/bootstrap@5.0.2/dist/js/bootstrap.bundle.min.js" integrity="sha384-MrcW6ZMFYlzcLA8Nl+NtUVF0sA7MsXsP1UyJoMp4YLEuNSfAP+JcXn/tWtIaxVXM" crossorigin="anonymous"></script>
<hr>
<div class="container" style="width: 50%;">
  <h4 style="text-align: center;">Custom User Login</h4>
  <br><br>
  <form method="POST" action="{{ url('/custom-login') }}">
    @csrf
    <div class="mb-3 row">
    <label for="staticEmail" class="col-sm-2 col-form-label"><b>Email</b></label>
    <div class="col-sm-10">
      <input type="text" name="email" class="form-control" id="staticEmail" value="email@example.com">
    </div>
  </div>
  <div class="mb-3 row">
    <label for="inputPassword" class="col-sm-2 col-form-label"><b>Password</b></label>
    <div class="col-sm-10">
      <input type="password" name="password" class="form-control" id="inputPassword">
    </div>
  </div>
  <br>
  <div class="mb-3 row">
    <label for="staticEmail" class="col-sm-2 col-form-label"></label>
    <div class="col-sm-10">
      <button type="submit" class="btn btn-primary">Submit</button>
    </div>
  </div>
  </form>

</div>

<script src="https://cdn.jsdelivr.net/npm/@popperjs/core@2.9.2/dist/umd/popper.min.js" integrity="sha384-IQsoLXl5PILFhosVNubq5LC7Qb9DXgDA9i+tQ8Zj3iwWAwPtgFTxbJ8NT4GN1R8p" crossorigin="anonymous"></script>
<script src="https://cdn.jsdelivr.net/npm/bootstrap@5.0.2/dist/js/bootstrap.min.js" integrity="sha384-cVKIPhGWiC2Al4u+LWgxfKTRIcfu0JTxR+EQDz/bgldoEyl4H0zUF0QKbrJ0EcQF" crossorigin="anonymous"></script>
front-register.blade.php
<link href="https://cdn.jsdelivr.net/npm/bootstrap@5.0.2/dist/css/bootstrap.min.css" rel="stylesheet" integrity="sha384-EVSTQN3/azprG1Anm3QDgpJLIm9Nao0Yz1ztcQTwFspd3yD65VohhpuuCOmLASjC" crossorigin="anonymous">
<script src="https://cdn.jsdelivr.net/npm/bootstrap@5.0.2/dist/js/bootstrap.bundle.min.js" integrity="sha384-MrcW6ZMFYlzcLA8Nl+NtUVF0sA7MsXsP1UyJoMp4YLEuNSfAP+JcXn/tWtIaxVXM" crossorigin="anonymous"></script>
<hr>
<div class="container" style="width: 50%;">
  <h4 style="text-align: center;">Custom User Register</h4>
  <br><br>
  <form method="POST" action="{{ url('/custom-register') }}">
      @csrf
      <div class="mb-3 row">
        <label for="staticEmail" class="col-sm-2 col-form-label"><b>Name</b></label>
        <div class="col-sm-10">
          <input type="text" name="name" class="form-control" id="staticEmail">
        </div>
      </div>
      <div class="mb-3 row">
        <label for="staticEmail" class="col-sm-2 col-form-label"><b>Email</b></label>
        <div class="col-sm-10">
          <input type="text" name="email" class="form-control" id="staticEmail">
        </div>
      </div>
      <div class="mb-3 row">
        <label for="inputPassword" class="col-sm-2 col-form-label"><b>Password</b></label>
        <div class="col-sm-10">
          <input type="password" name="password" class="form-control" id="inputPassword">
        </div>
      </div>
      <br>
      <div class="mb-3 row">
        <label for="staticEmail" class="col-sm-2 col-form-label"></label>
        <div class="col-sm-10">
          <button type="submit" class="btn btn-primary">Submit</button>
        </div>
      </div>
  </form>

</div>
<script src="https://cdn.jsdelivr.net/npm/@popperjs/core@2.9.2/dist/umd/popper.min.js" integrity="sha384-IQsoLXl5PILFhosVNubq5LC7Qb9DXgDA9i+tQ8Zj3iwWAwPtgFTxbJ8NT4GN1R8p" crossorigin="anonymous"></script>
<script src="https://cdn.jsdelivr.net/npm/bootstrap@5.0.2/dist/js/bootstrap.min.js" integrity="sha384-cVKIPhGWiC2Al4u+LWgxfKTRIcfu0JTxR+EQDz/bgldoEyl4H0zUF0QKbrJ0EcQF" crossorigin="anonymous"></script>
Step 8:- Now implement the CustomAuthController as shown below
CustomAuthController.php
<?php

namespace App\Http\Controllers;

use Illuminate\Http\Request;
use App\Models\User;
use DB;
use Session;
use Auth;

class CustomAuthController extends Controller
{
    //
    public function front_user_login(){

        return view('auth.front-login');
    }

    public function front_user_register(){

        return view('auth.front-register');
    }
     public function userregister(Request $request)
    {
        if($request->isMethod('post'))
        {
            $data = $request->all();
            //dd($data);
            $usercount = User::where(['email'=>$data['email']])->count();
            //dd($usercount);
            if($usercount>0)
            {
                return redirect('/custom-login')->with('danger','This user already exist!');
            }
            else{
                $newuser = new User;
                $newuser->name = $data['name'];
                $newuser->email = $data['email'];
                $newuser->password = bcrypt($data['password']);
                $newuser->save();

                  if (Auth::attempt(['email' => $data['email'], 'password'=>$data['password']])) {

                       Session::put('frontSession',$data['email']);
                       return redirect('/dashboard')->with('success','Registration Successfull');

                    }

             }

        }
    }

    public function userlogin(Request $request){

                if($request->isMethod('post'))
                {
                    $data = $request->all();
                 if(Auth::attempt(['email'=>$data['email'],'password'=>$data['password']]))
                    {
                        Session::put('frontSession',$data['email']);
                        return redirect('/dashboard')->with('success','Login Successfull');
                    }
                    else{
                        return redirect()->back()->with('danger','Invalid username or Password!');
                    }
                }

    }

    public function userlogout(){


        Session::forget('frontSession');
        Auth::logout();
        return redirect('/dashboard');

    }
}
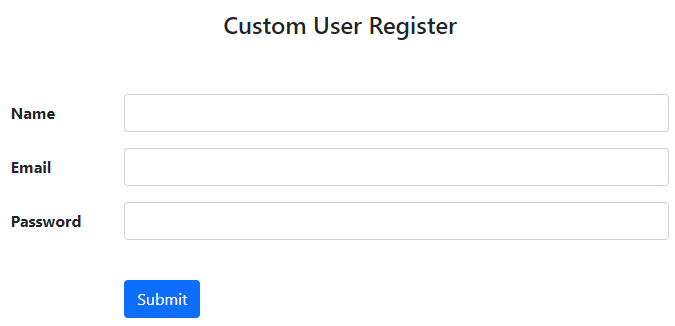
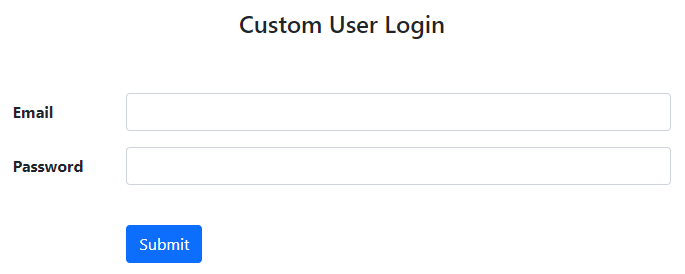
Step 9:- Open the browser and enter the URL’s as shown below
http://127.0.0.1:8000/custom-register
http://127.0.0.1:8000/custom-login
Images of above URL’s
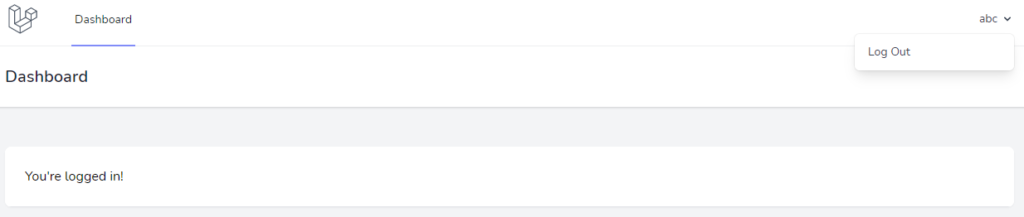
After successful login, you will be redirected as shown below
Read also, CRUD operation in laravel 5.8 step by step for Beginners
Conclusion:- I hope this tutorial will help you understand the concept. If there is any doubt then please leave a comment below.