
Hi friends, in this tutorial, you will learn how to do localization implementation in Laravel with language switcher. I will explain the details in a step-by-step process to implement Laravel localization. In this example, I will use English and Bengali.
Why do we need Laravel Localization?
Sometimes we need to change the language of any application or any web page of a website as per the client’s requirements then the Laravel localization comes into play with a language switcher.
Larvel localization plays an important role in changing the language of a web page into any language of the word and it does not require any third-party API or Google API to do so.
Step for localization implementation in Laravel with language switcher
Step 1:- Create a Laravel project in the root directory of your local server. If you do not know how to create a Laravel project then read also
Step 2:- Now, create a route in the web.php file under the routes folder of the project.
Route::get('/home',function(){
   return view ('home');
});
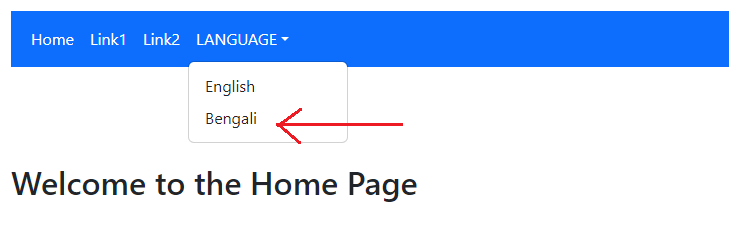
Step 3:- Next, we will create a blade file that will display a navigation bar with language options in English, and Bengali so that whenever we click on the English option from the dropdown menu English contents will be shown. On the other hand, whenever we click on the Benali option from the dropdown menu Bengali contents will be shown.
home.blade.php
<!DOCTYPE html>
<html lang="en">
<head>
  <title>Bootstrap Example</title>
  <meta charset="utf-8">
  <meta name="viewport" content="width=device-width, initial-scale=1">
  <link href="https://cdn.jsdelivr.net/npm/bootstrap@5.3.2/dist/css/bootstrap.min.css" rel="stylesheet">
  <script src="https://cdn.jsdelivr.net/npm/bootstrap@5.3.2/dist/js/bootstrap.bundle.min.js"></script>
</head>
<body>

<div class="container mt-3">
  <nav class="navbar navbar-expand-sm bg-primary navbar-dark">
  <div class="container-fluid">
    <ul class="navbar-nav">
      <li class="nav-item">
        <a class="nav-link active" href="/home">{{ trans('messages.Home') }}</a>
      </li>
      <li class="nav-item">
        <a class="nav-link active" href="#">{{ trans('messages.Link1') }}</a>
      </li>
      <li class="nav-item">
        <a class="nav-link active" href="#">{{ trans('messages.Link2') }}</a>
      </li>
      <li class="nav-item active dropdown">
        <a class="nav-link dropdown-toggle" href="#" role="button" data-bs-toggle="dropdown">{{ trans('messages.LANGUAGE') }}</a>
        <ul class="dropdown-menu">
          <li><a class="dropdown-item" href="change_language/en">{{ trans('messages.English') }}</a></li>
          <li><a class="dropdown-item" href="change_language/bn">{{ trans('messages.Bengali') }}</a></li>
        </ul>
      </li>
    </ul>
  </div>
</nav>
<br>
<h2>{{ trans('messages.Welcome to the Home Page') }}</h2>
</div>
</body>
</html>
Step 4:- Now, create a folder “bn” under resources/lang/ and then create a file name “messages.php” under the “bn” folder.
Step 5:- Open the messages.php under the “bn” folder and put the contents as given below which are taken from Google.
messages.php
<?php
return [
'Welcome to the Home Page' => 'হোম পেজে স্বাগতম',
'Home' => 'বাড়ি',
'Link1' => 'লিঙ্ক 1',
'Link2' => 'লিঙ্ক2',
'LANGUAGE' => 'ভাষা',
'English' => 'ইংরেজি',
'Bengali' => 'বাংলা',
];
Step 6:- Now, create the same file “messages.php” under the resources/lang/en/ folder and put the contents as given below.
messages.php
<?php
return [
'Welcome to the Home Page' => 'Welcome to the Home Page',
'Home' => 'Home',
'Link1' => 'Link1',
'Link2' => 'Link2',
'LANGUAGE' => 'LANGUAGE',
'English' => 'English',
'Bengali' => 'Bengali',
];
Step 7:- Now, make a middleware SetLocale.php using the below command.
php artisan make:middleware SetLocale
The purpose of the above middleware is to set the language based on user preferences or user selection.
Step 8:- Now, open the SetLocale.php under App\Http\Middleware and update the file as given below.
SetLocale.php
<?php

namespace App\Http\Middleware;

use Closure;
use Illuminate\Http\Request;
use Illuminate\Support\Facades\App;

class SetLocale
{
    /**
     * Handle an incoming request.
     *
     * @param  \Illuminate\Http\Request  $request
     * @param  \Closure(\Illuminate\Http\Request): (\Illuminate\Http\Response|\Illuminate\Http\RedirectResponse)  $next
     * @return \Illuminate\Http\Response|\Illuminate\Http\RedirectResponse
     */
    public function handle(Request $request, Closure $next)
    {
        $locale = session('user_locale', 'en'); // Default to English if not set

        App::setLocale($locale);
        return $next($request);
    }
}
Step 9:- Now, go to App\Http\Kernal.php and put the line “\App\Http\Middleware\SetLocale::class,” as shown below.
protected $middlewareGroups = [
        'web' => [
            \App\Http\Middleware\EncryptCookies::class,
            \Illuminate\Cookie\Middleware\AddQueuedCookiesToResponse::class,
            \Illuminate\Session\Middleware\StartSession::class,
            // \Illuminate\Session\Middleware\AuthenticateSession::class,
            \Illuminate\View\Middleware\ShareErrorsFromSession::class,
            \App\Http\Middleware\VerifyCsrfToken::class,
            \Illuminate\Routing\Middleware\SubstituteBindings::class,
            \App\Http\Middleware\SetLocale::class,
        ],

        'api' => [
            // \Laravel\Sanctum\Http\Middleware\EnsureFrontendRequestsAreStateful::class,
            'throttle:api',
            \Illuminate\Routing\Middleware\SubstituteBindings::class,
        ],
    ];
Step 10:- Now, create another route to change the language as shown in the above blade file.
Route::get('/change_language/{locale}', [LocalizationController::class,'changeLanguage'])
    ->name('change.language');
Step 11:- Now, create a controller using the below command.
php artisan make:controller LocalizationController
Step 12:- Now, open the controller and put the below contents.
<?php

namespace App\Http\Controllers;

use Illuminate\Http\Request;
use App;

class LocalizationController extends Controller
{
    //
    public function changeLanguage($locale)
    {
        //dd($locale);
        session(['user_locale'=> $locale]);
        // Validate the selected language
        $supportedLanguages = ['en', 'bn']; // Add 'as' for Assamese

        if (!in_array($locale, $supportedLanguages)) {
            abort(404);
        }
        // Set the application locale
        App::setLocale($locale);

        // Redirect back or to a specific page
        return redirect('/home');
    }
}
Step 13:- Insert the below line on top of the web.php file if you are using Laravel 8.
use App\Http\Controllers\LocalizationController;
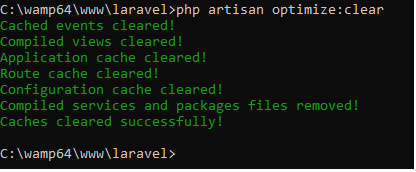
Step 14:- Now, run the below command to clear all the configuration cache and route cache.
php artisan optimize:clear
Step 15:- Now, you can change the language from English to Bengali as shown in the below picture and you will see that the contents on the home page have been changed.

Step 16:- Please note that in home.blade.php I have used the trans() function to display the text based on the desired user languages.
Conclusion:- I hope this tutorial will help you to understand the concept of Laravel localization. If there is any doubt then please leave a comment below.
Hi it’s me, I am also visiting this website daily, this website is in fact fastidious and the people are really sharing pleasant thoughts.