Hi friends, today I will explain how to send email in laravel using Sendinblue email service provider. Sendinblue is very fast and smooth to send emails within a second. Actually, I am very disappointed about email sending via gmail smtp because Gmail often changes its policy. As you all know, earlier Gmail has a feature of less secure app access with ON and OFF.
Also read, Laravel custom authentication step-by-step tutorial
If you ONN this feature then Gmail will allow you to receive emails in your inbox while sending emails through Gmail SMTP but if you OFF this feature then Gmail will not allow emails to enter your mailbox. But nowadays, this feature is not available in Gmail.
Aside, you can generate an app password from Gmail but that is also not working as expected. That is why I have used the Sendinblue email service provider. Sendinblue provides the facility to send 300 emails per day currently. In order to send emails using sendinblue you can follow the below steps.
Required steps to send email in Laravel using Sendinblue
Step 1:- Create an account in Sendinblue.
Step 2:- Complete the process of sendinblue account verification by following the instructions received in your mailbox.
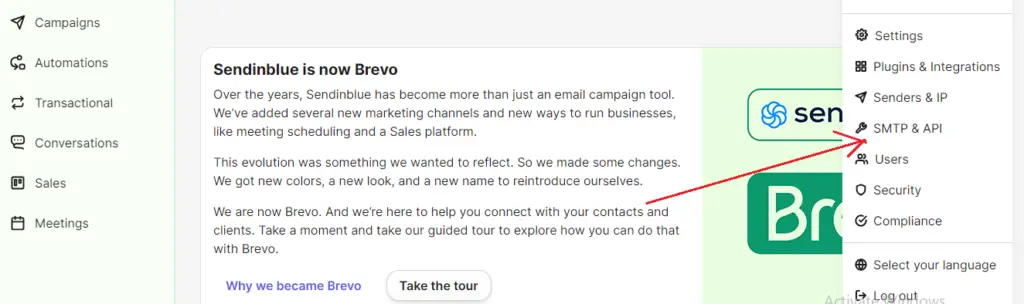
Step 3:- Now, login to your Sendinblue account and click the SMTP & API settings on the right side under username as shown below.
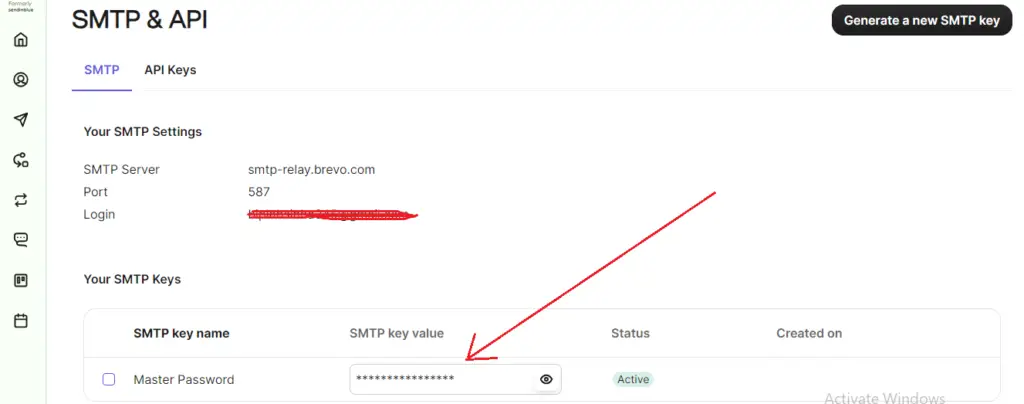
Step 4:- Now, get the SMTP details as shown below.
Step 5:- Now, configure the .env file of your Laravel project as shown below.
MAIL_MAILER=smtp
MAIL_HOST=smtp-relay.sendinblue.com
MAIL_PORT=587
MAIL_USERNAME=your sendinblue email
MAIL_PASSWORD=master password shown on the above image
MAIL_ENCRYPTION=tls
MAIL_FROM_ADDRESS=your sendinblue email
MAIL_FROM_NAME="${APP_NAME}"
if you do not know how to create a laravel project then read the below article.
Step 6:- Now, set up the routes in the web.php file under the routes folder of your project as shown below.
Route::get('send-mail', [UploadFileController::class,'sendmail']);
Route::post('send-email', [UploadFileController::class,'sendemail']);
Step 7:- Now, create a controller using the below artisan command.
php artisan make:controller MailController
Step 7:- Now, create a mailable class using the artisan command as shown below.
php artisan make:mail myMail
you will find the mailable class under App\Mail\
Step 8:- Now, modify the MailController as given below.
<?php

namespace App\Http\Controllers;

use Illuminate\Http\Request;
use Mail;
use App\Mail\myMail;

class MailController extends Controller
{
    //
    public function sendmail()
    {
      //dd('ok');
      return view('sendmail');
    }

    public function sendemail(){

        $details = [
            'title' => 'Mail from pbphpsolutions.com',
            'body' => 'Welcome to pbphpsolutions. We are now able to send email without gmail smtp server.'
        ];

        Mail::to('receivers email')->send(new myMail($details));
        //dd('Mail Sent');
        //return "Email sent successfully";
        return redirect('/send-mail')->with('success','Email has been sent successfully');
    }
}
Step 9:- Now, modify myEmail.php as shown below.
<?php

namespace App\Mail;

use Illuminate\Bus\Queueable;
use Illuminate\Contracts\Queue\ShouldQueue;
use Illuminate\Mail\Mailable;
use Illuminate\Queue\SerializesModels;

class myMail extends Mailable
{
    use Queueable, SerializesModels;
    public $details;

    /**
     * Create a new message instance.
     *
     * @return void
     */
    public function __construct($details)
    {
        //
        $this->details = $details;
    }

    /**
     * Build the message.
     *
     * @return $this
     */
    public function build()
    {
        //return $this->view('view.name');

        return $this->subject('Mail from PBPHPSOLUTIONS.COM')
        ->view('mails.myMail');
    }
}
Step 10:- Now, create a myMail.balde.php file under resources/views/mails/ as given below.
<!DOCTYPE html>
<html>
<head>
    <title>pbphpsolutions.com</title>
</head>
<body>
    <p>{{ $details['title'] }}</p>
    <p>{{ $details['body'] }}</p>
    <br>
    <p>
    	<b><i>Thanx and Regards,</i></b><br>
    	pbphpsolutions
    </p>
</body>
</html>
Step 11:- Now, create another sendmail.blade.php file under resources/views as given below.
<!doctype html>
<html lang="en">
  <head>
    <!-- Required meta tags -->
    <meta charset="utf-8">
    <meta name="viewport" content="width=device-width, initial-scale=1">

    <!-- Bootstrap CSS -->
    <link href="https://cdn.jsdelivr.net/npm/bootstrap@5.0.2/dist/css/bootstrap.min.css" rel="stylesheet">

    <title>Send email in Laravel using Sendinblue!</title>

  </head>
  <body>

  	<form method="post" action="/send-email">
  	@csrf
  		<div class="container-fluid" style="width: 50%;">
  			<br>
  			@if(Session::has('success'))
  			<div class="alert alert-success" role="alert">
			  {{Session::get('success')}}<button type="button" class="btn-close" data-bs-dismiss="alert" aria-label="Close" style="text-align: right;"></button>
			</div>
  			@endif
	  		<h3>Send email in Laravel using Sendinblue!</h3>
	  		<div class="mb-3">
			  <label for="exampleFormControlInput1" class="form-label">Email address</label>
			  <input type="email" class="form-control" name="email" id="exampleFormControlInput1">
			</div>
			<div class="mb-3">
			  <label for="exampleFormControlTextarea1" class="form-label">Message</label>
			  <textarea class="form-control" id="exampleFormControlTextarea1" rows="3" name="message"></textarea>
			</div>
			<div class="mb-3">
			  <button type="submit" class="btn btn-primary btn-sm">Send</button>
			</div>
	  	</div>
  	</form>
    <script src="https://cdn.jsdelivr.net/npm/bootstrap@5.0.2/dist/js/bootstrap.bundle.min.js"></script>
  </body>
</html>
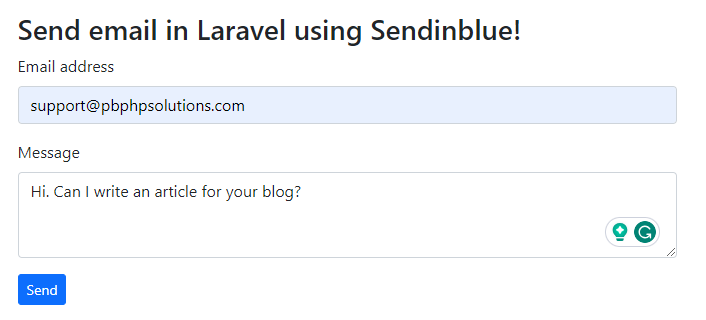
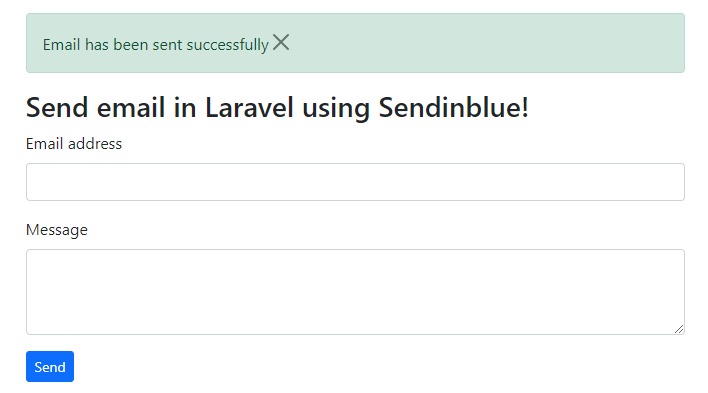
Step 12:- Now, open your browser and hit the URL https://127.0.0.1:8000/send-mail and you can see the HTML form as shown below.
Step 13:- After sending the message, you can see the output as shown below.
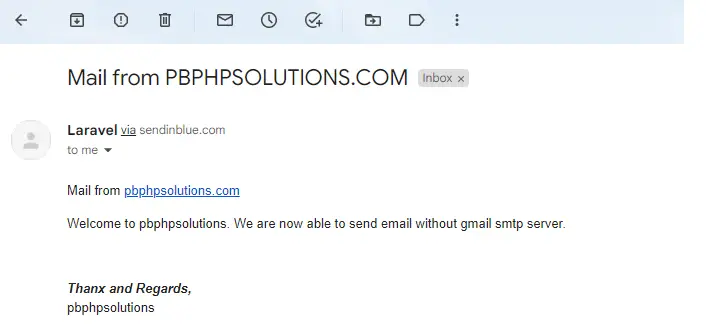
Step 14:- Now, you can check your mailbox whether the email was received or not as shown below.
Conclusion:- I hope this tutorial will help you to understand the concept. If there is any doubt then please leave a comment below.